Posting To Your Server
Please Log In for full access to the web site.
Note that this link will take you to an external site (https://shimmer.mit.edu) to authenticate, and then you will be redirected back to this page.
Testing Framework
As we start to develop our system across multiple environments (embedded and server), you may find it relatively easy to debug on the embedded side using the Serial monitor, but how could we debug our code on the server?
Since the majority of the code that we put on the server is intended to ultimately interact with HTTP requests, it would be really nice if we could somehow easily test fire GET and POST responses to our code and see how it acts.
There are online ways of doing this. For example, Google has a few, but you have to click on images of road signs and stores to make them work and that grows old fast.
For 6.900 we're going to strongly recommend you install PostMan. We as staff have no financial interest in Postman, but we've found from past classes that it works well in that it is both robust and relatively easy to use (and it has a GUI). If there's another piece of software that you like using for this (that isn't Google's sign-clicking thing), feel free to use it! We just want you to be able to debug server code easily!
Once installed, you can go into Postman and start sending GET and POST requests with ease! (This is much nicer than using your ESP32 to debug.)
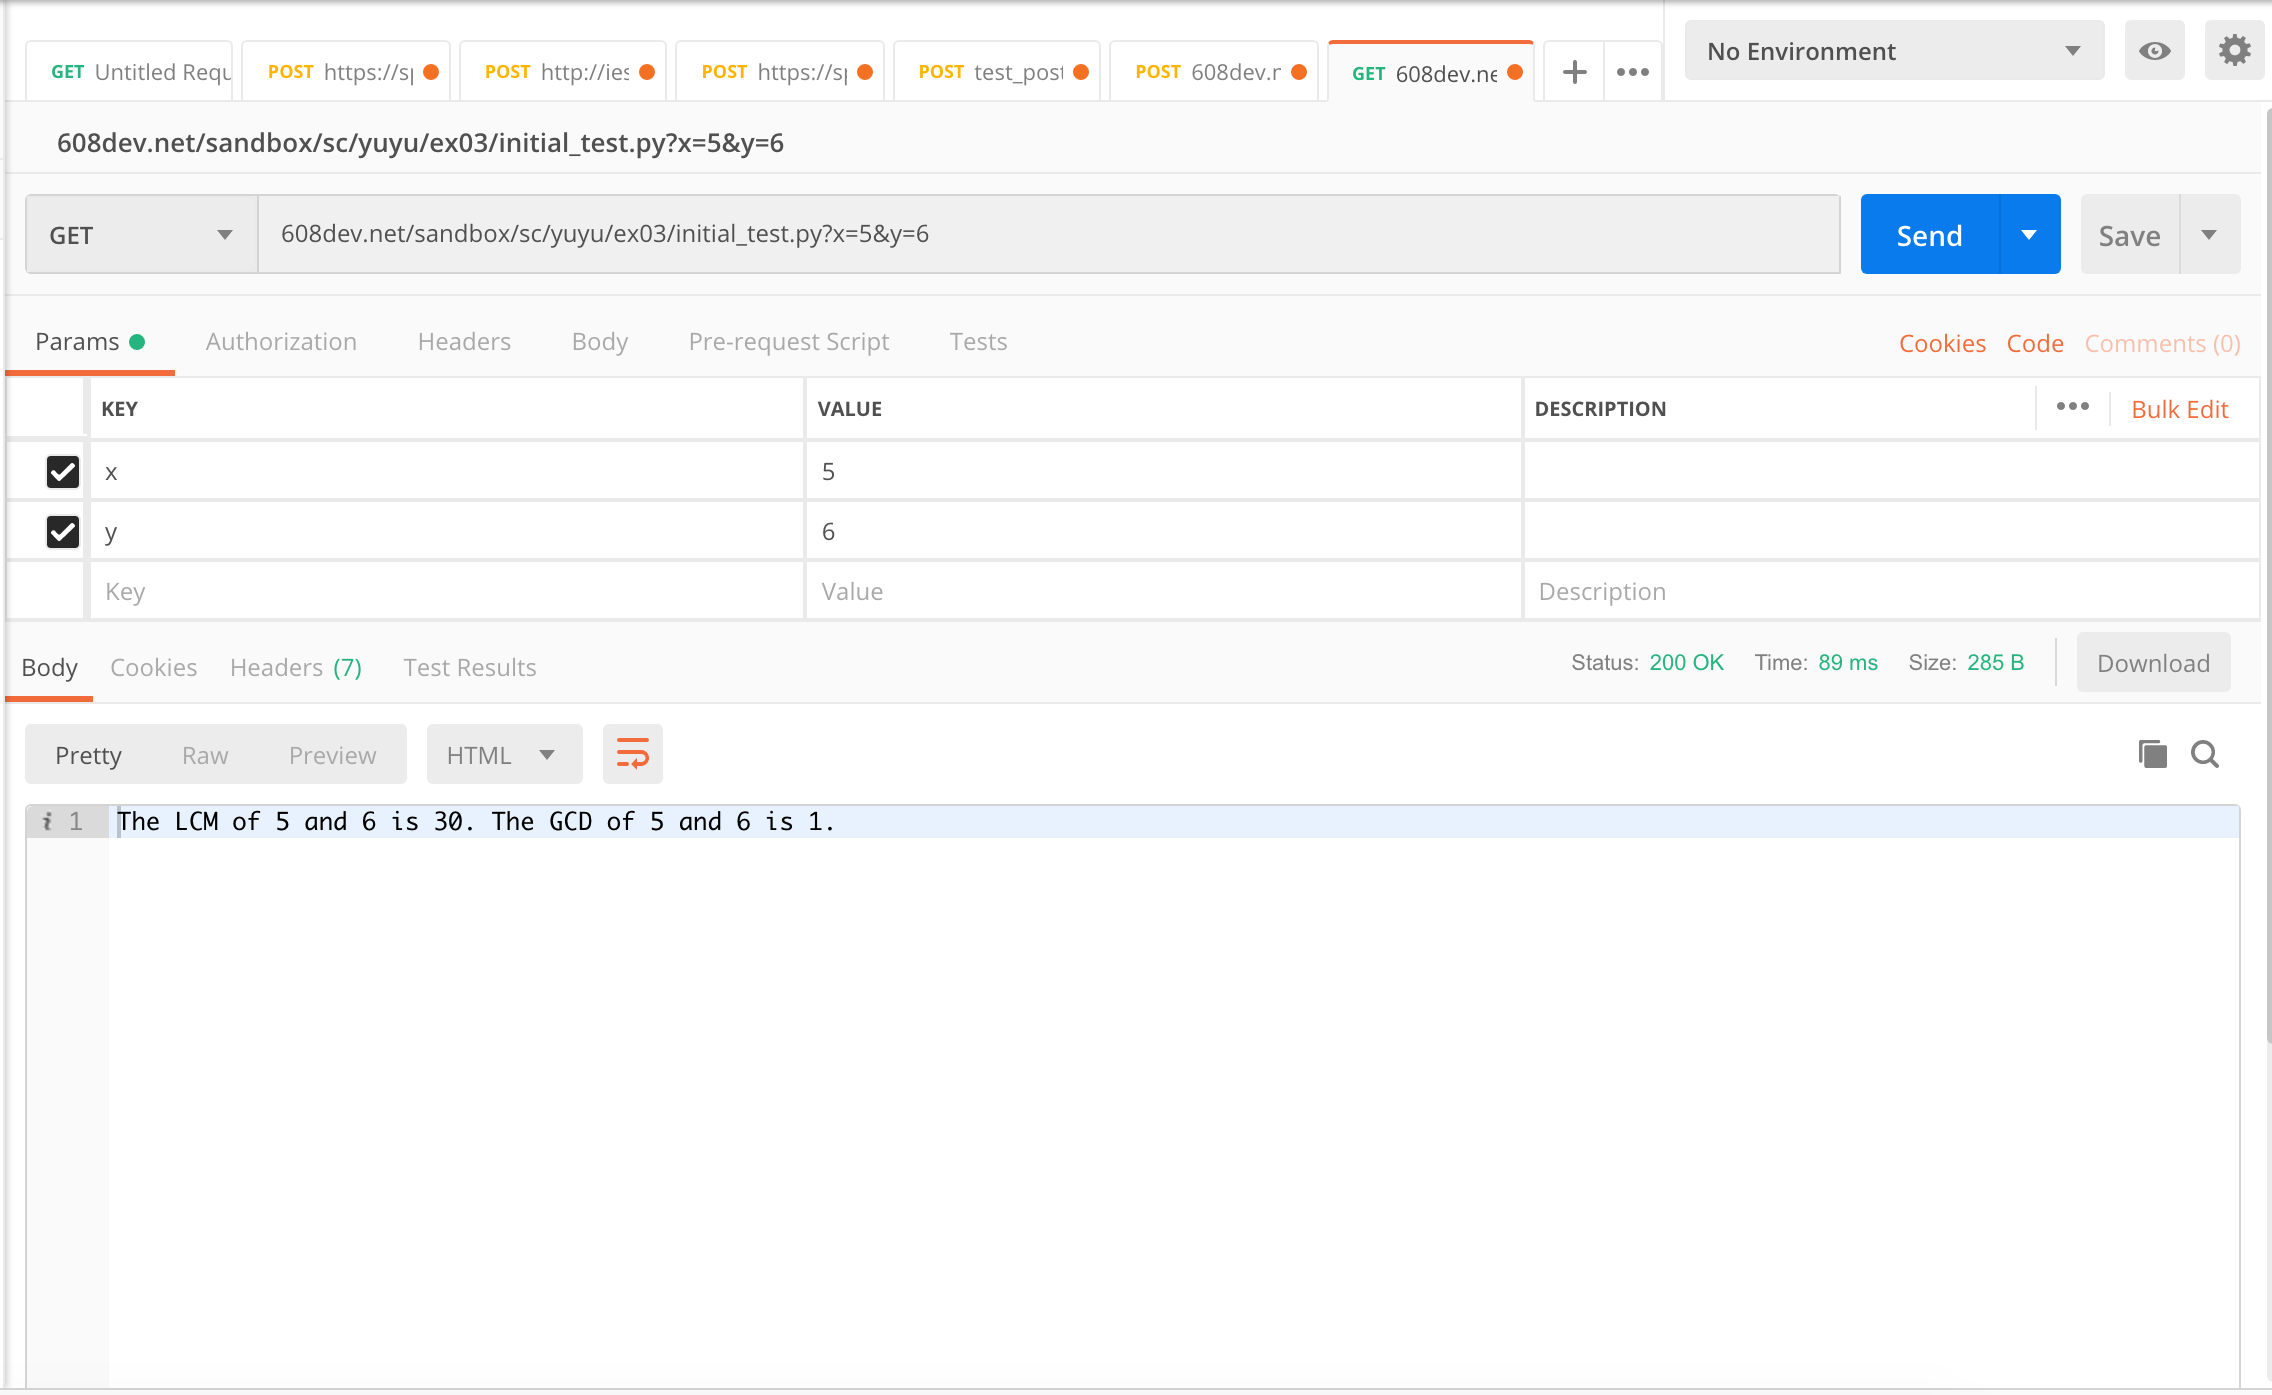
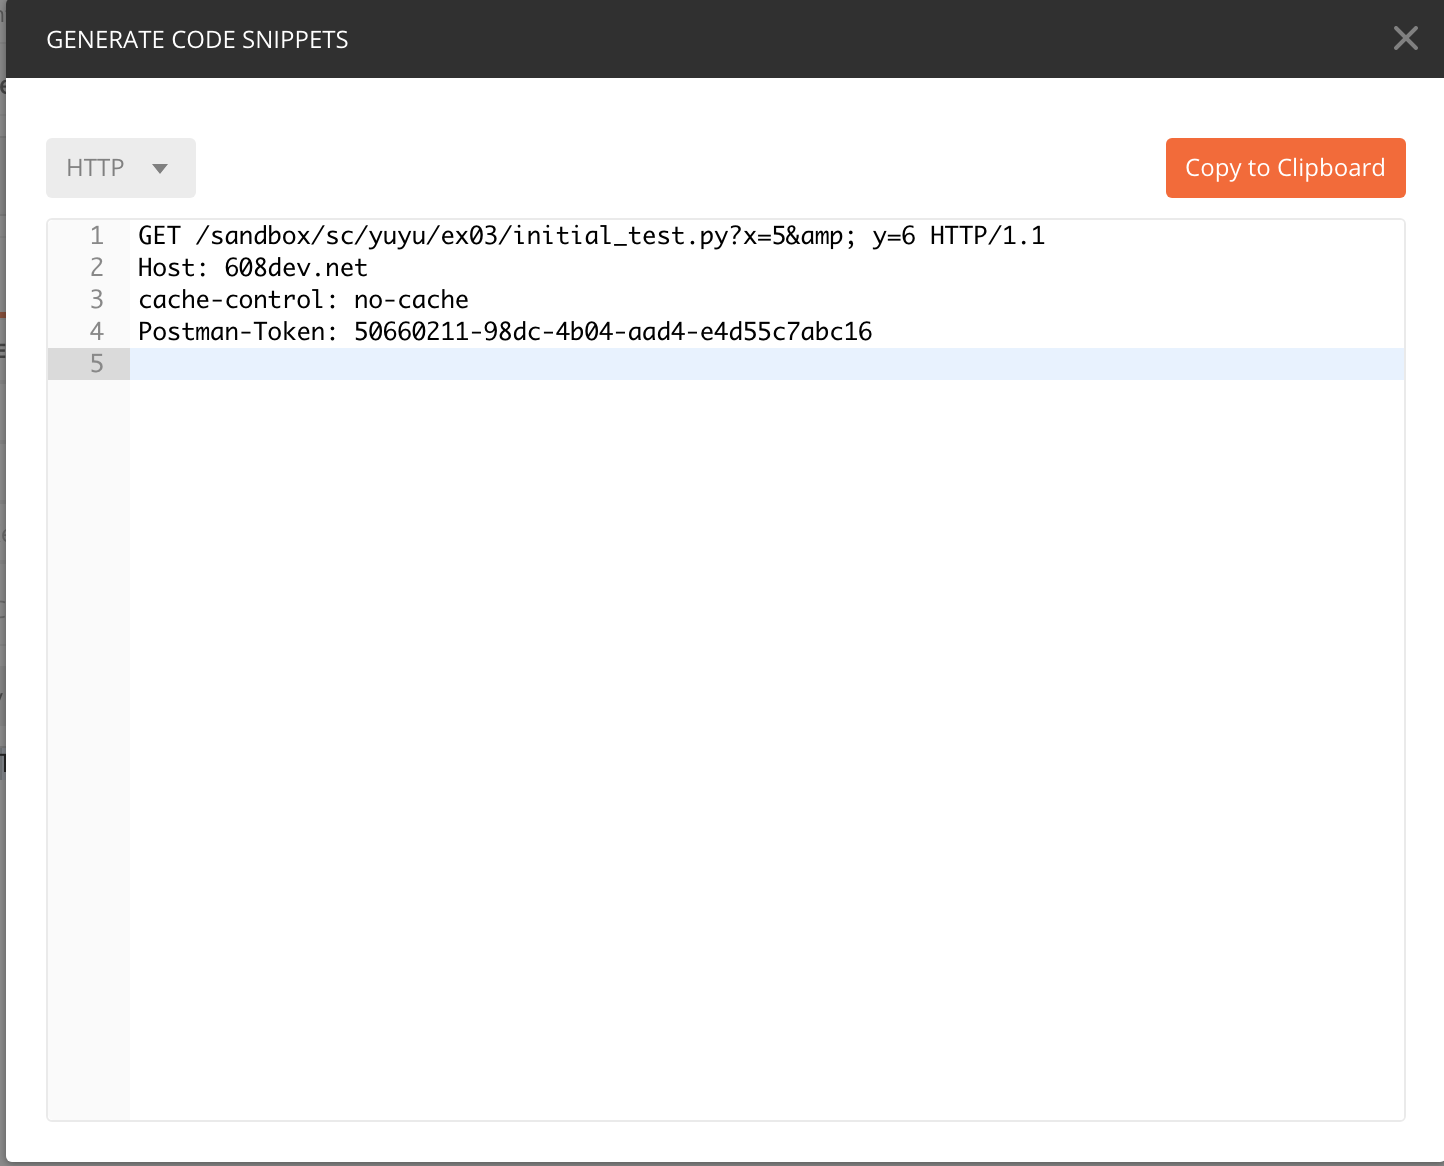
On the right side, you can also see the RAW HTTP request as it was sent up by pressing the "Code" button! This can be really helpful when trying to figure out why a POST or GET from the ESP32 isn't going through, but you can get it working in PostMan.
GETs and POSTs
As we're getting farther along in our FastAPI application journey, it's now time to adopt some common conventions. One important one concerns the difference between GET and POST requests.
The BIG thing about GET requests and POST requests is that generally speaking a GET should be idempotent meaning that it should not cause changes to the state of a server (i.e., the db on the server). GET requests are meant for getting data from a resource but not modifying the data that is stored. POST requests should be non-idempotent meaning they can modify the data that is stored.
Wait a second, weren't we just using GET requests to log data on the previous exercise? Well yeah. We shouldn't have been doing that, but we shouldn't be burning fossil fuels at the rate we are either. It was easier to just do that set of exercises with a GET request, but going forward, in designing good APIs we want to adhere to the idempotency rule about GETs and POSTs.
If you are interested, for reference here is a slide deck from an old class (6.08) that has some good notes about GETs and POSTs.
POSTing with data in the body
When we POST data, we can use HTTP query parameters like we did up till now, but that will quickly get too annoying if you want to POST alot of data, as you probably will for your project. So let's POST the data using the POST body. Today we'll use key-value pairs as encoded using a Form-encoded body, though for your project you may end up encoding your data as a JSON body.
Create a new endpoint like: heat_index_post that accepts rh and t as key-value pairs in the POST body, such as rh=80&t=100 where rh and t are the usual suspects.
Your python code will be very similar to that in the last exercise, except that:
- you will not use the
historyparameter - return the t, rh, and heat_index values
- you can reuse the same db table from
heat_index2
from fastapi import FastAPI, Form

...

@app.post("/heat_index_post")
def read_sensor_data_form(rh: float = Form(0.0), t: float = Form(0.0)):
...
That Form function is a simple way to get parameters out of form-encoded data rather than using query parameters.
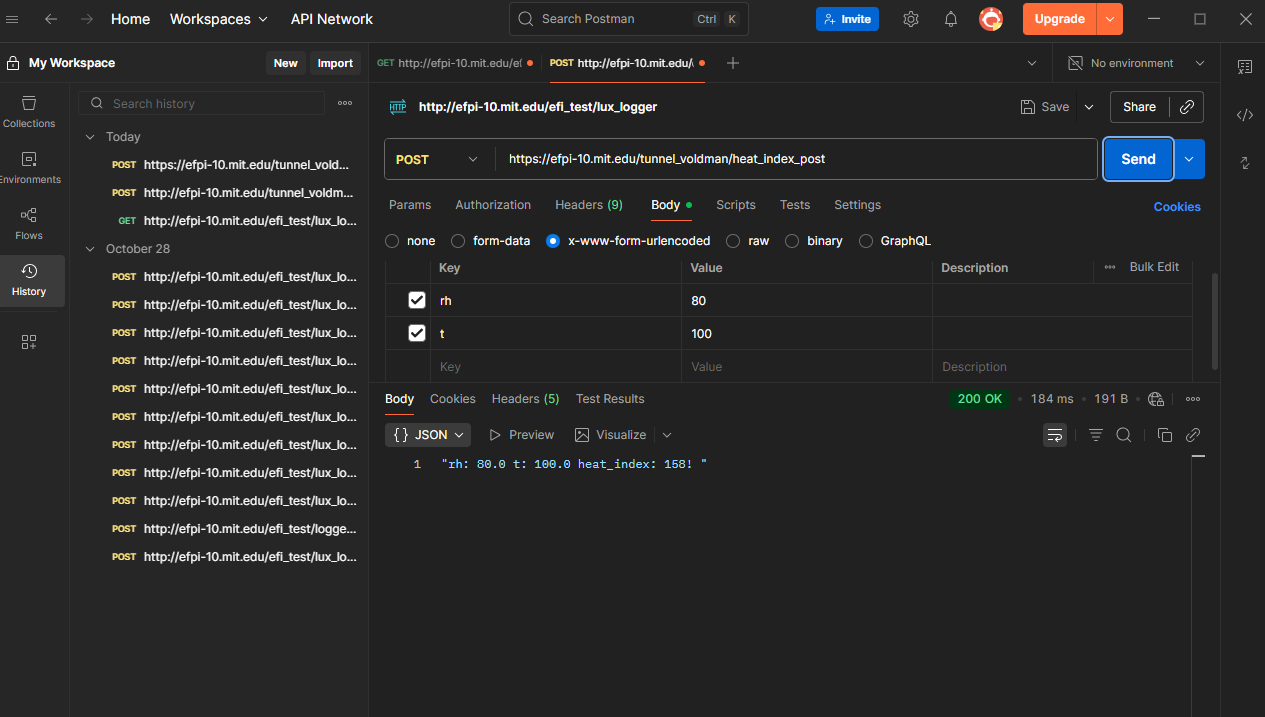
Test this endpoint using POSTman. Here's an example below of what you should see when it works. Note that we've selected to send a POST and in the Body selected x-www-form-urlencoded data. Then POSTman makes it super easy to enter key-value pairs.
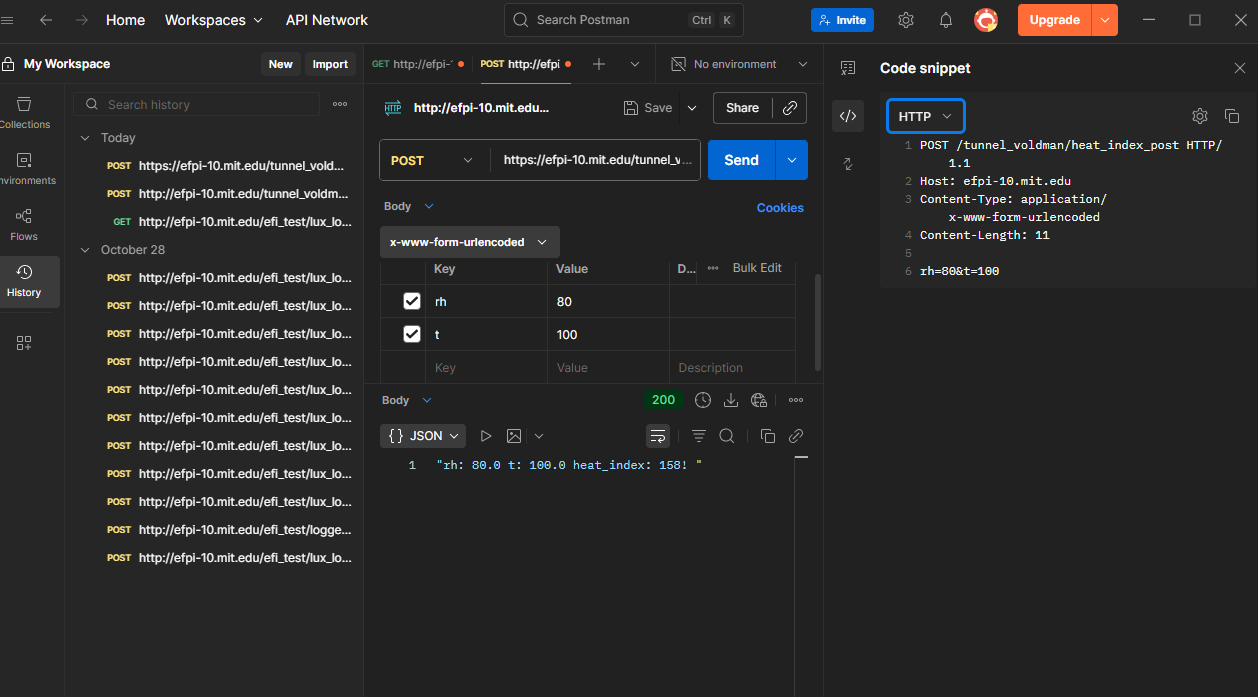
Now clicking on the Code view (<\>) and then selecting HTTP, we can see the raw text that was sent, showing the key-value pairs in a format more similar to what we used in lab01.
Logging Lux from your ESP32
And now we're ready to put it all together. For this final part of the assignment what you need is:
-
A FastAPI application POST endpoint that:
- Can log the lux and battery voltage as floats as well as the time when the measurement was received. You can log your kerberos (or not), or just use it as a simple sort of authentication (aka only update the db if the proper kerberos is provided).
- You'll need a new db (or at least new db table)
- For your POST endpoint, you can return something minimal, but make it informative
-
A FastAPI application GET endpoint that:
- takes in two arguments,
kerberos(astr) andtime(anint) in minutes, and will return back a list of the times, lux levels, and battery voltages that have been reported in the lasttimeminutes if you provide the properkerberos. - The GET endpoint should not
CREATEorUPDATEany db tables - You can present as rows of text (we haven't done FastAPI Templates yet so it is tricky to do more complicated formating))
- takes in two arguments,
The behavior needed on the server side is likely about 90% implemented already for you. Just expand your current efi_test application...add another two endpoints to handle this. You'll want to first test with POSTman before trying it with your embedded system.
When you do try it with your embedded system, you'll of course need to update the URL that it is POSTing to.
Deliverable!
Set up your system and let it run for at least one hour on battery power. Then upload two files. Your entire FastAPI application that you wrote and your sqlite database (one of the dozens of nice features of sqlite is that the database is essentially a file and can be easily copied unlike other database infrastructures where it gets a little more tangly).

Once Done
Once done, you'll have your very own entirely complete battery-powered lux monitor thing. And only in one week!