Posting Data
Please Log In for full access to the web site.
Note that this link will take you to an external site (https://shimmer.mit.edu) to authenticate, and then you will be redirected back to this page.
Testing Framework
As we start to develop our system across multiple environments (embedded and server), you may find it relatively easy to debug on the embedded side using the Serial monitor, but how could we debug our code on the server?
Since the majority of the code that we put on the server is intended to ultimately interact with HTTP requests, it would be really nice if we could somehow easily test fire GET and POST responses to our code and see how it acts.
There are online ways of doing this. For example, Google has a few, but you have to click on images of road signs and stores to make them work and that grows old fast.
For 6.900 we're going to strongly recommend you install PostMan. We as a staff have no financial interest in Postman, but we've found from past classes that it works well in that it is both robust but also relatively easy to use (and it has a GUI). If there's another piece of software that you like using for this (that isn't Google's sign-clicking thing), feel free to use it! We just want you to be able to debug server code easily!
Once installed, I can go into Postman and start sending GET and POST requests with ease! (This is much nicer than using your ESP32 to debug.)
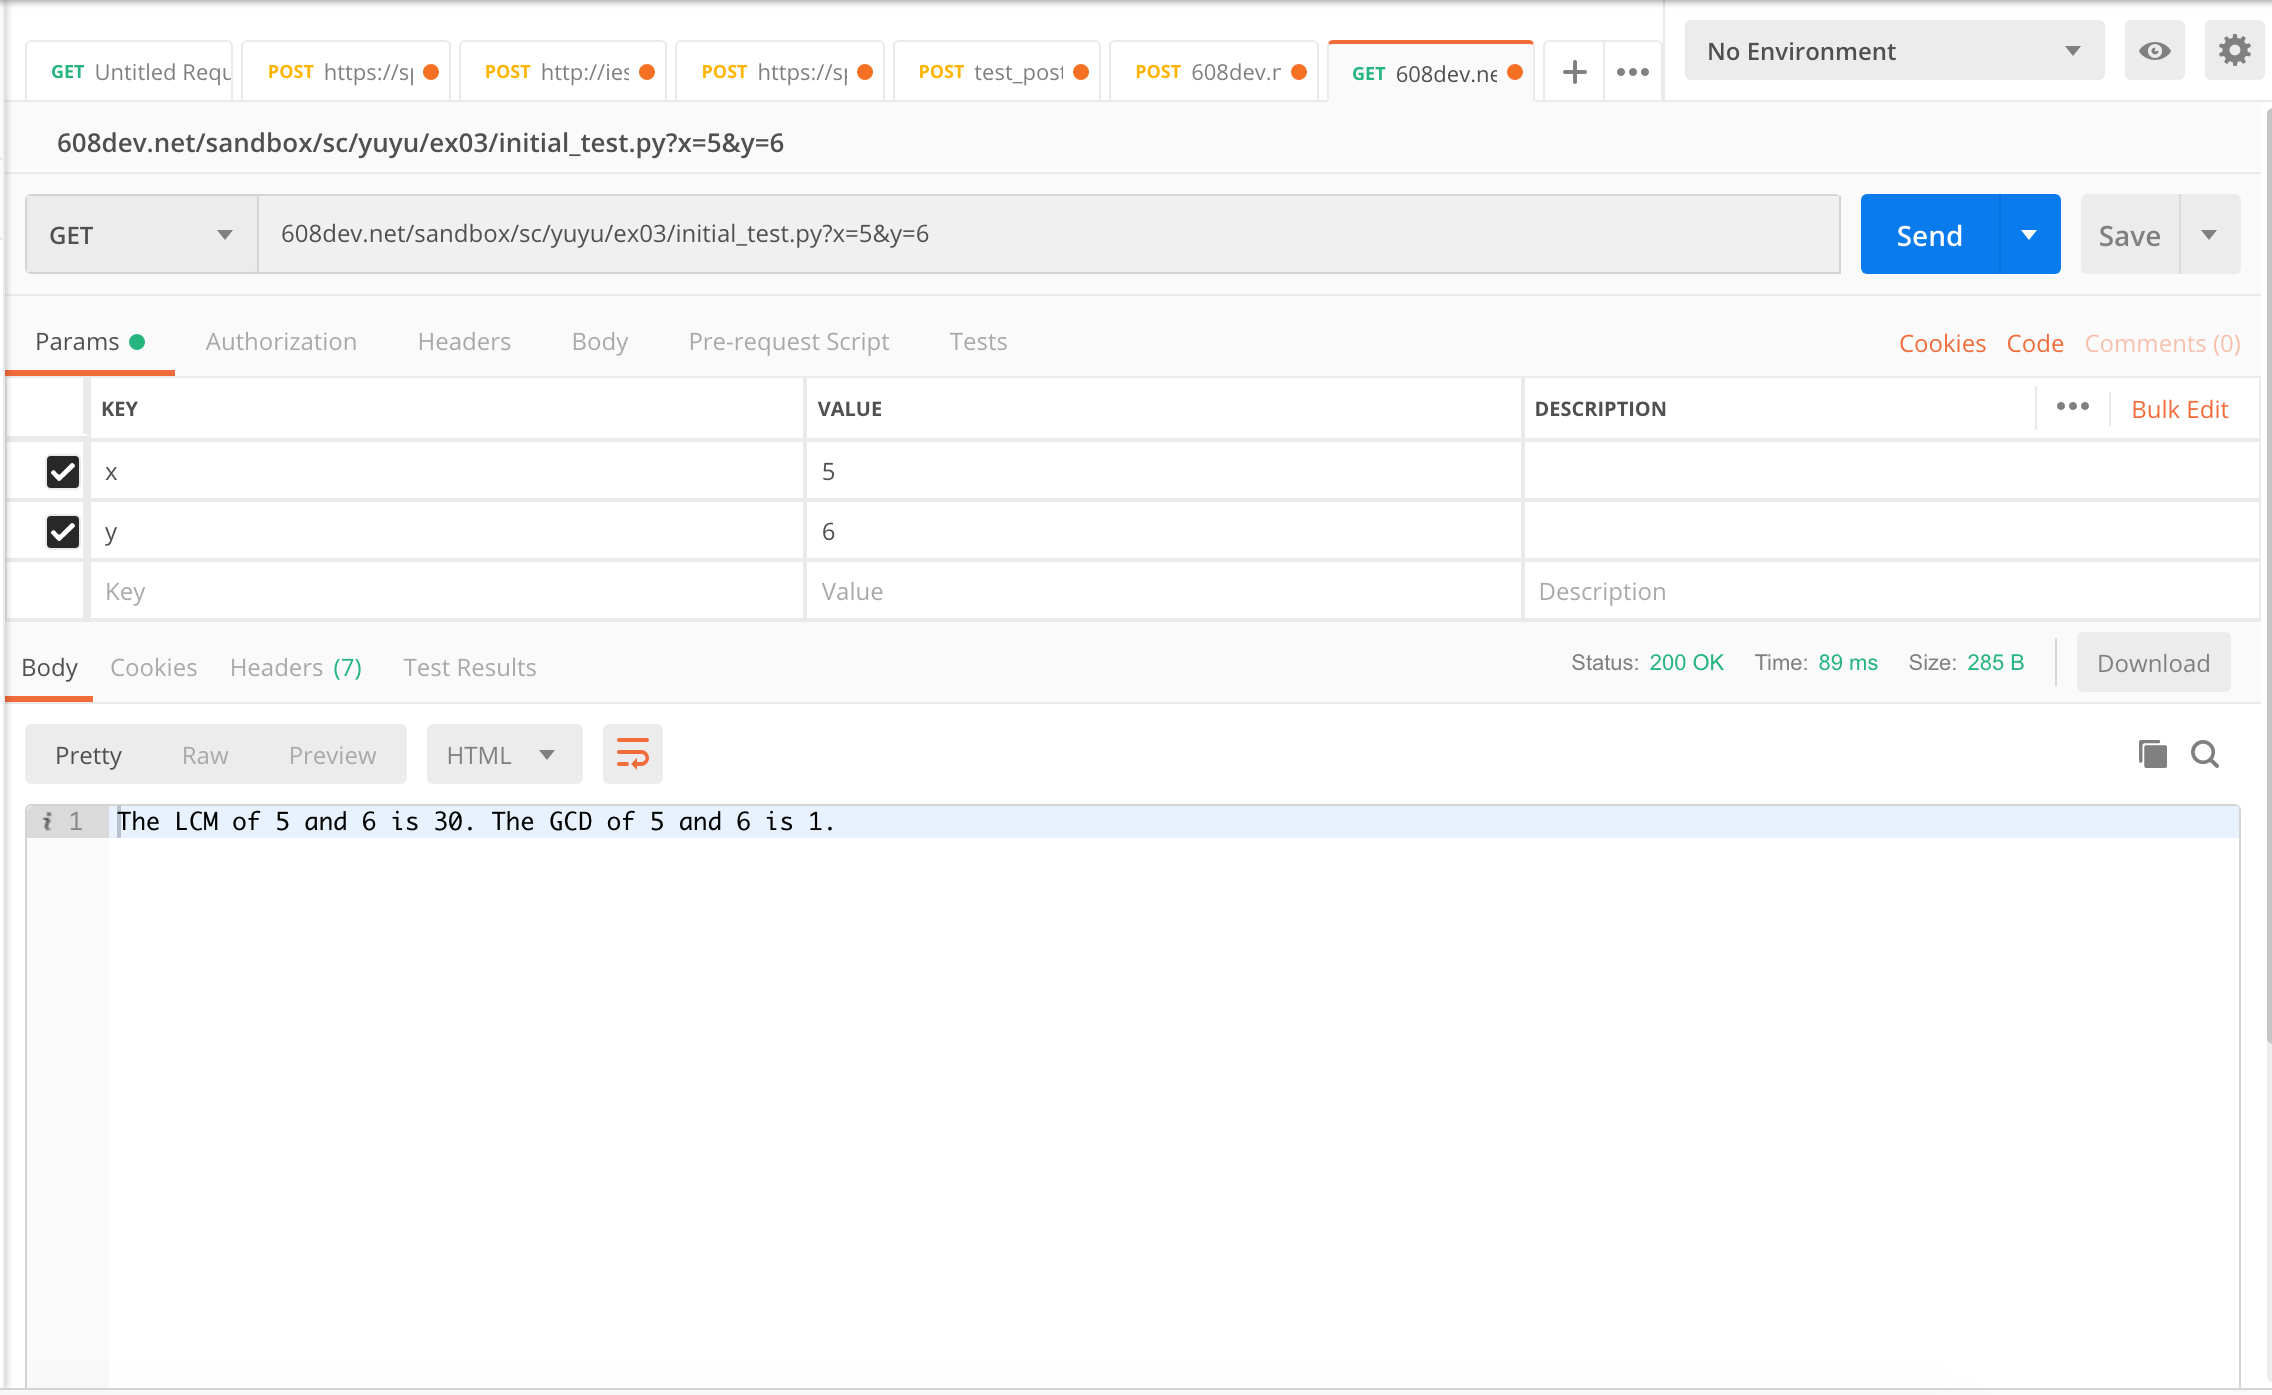
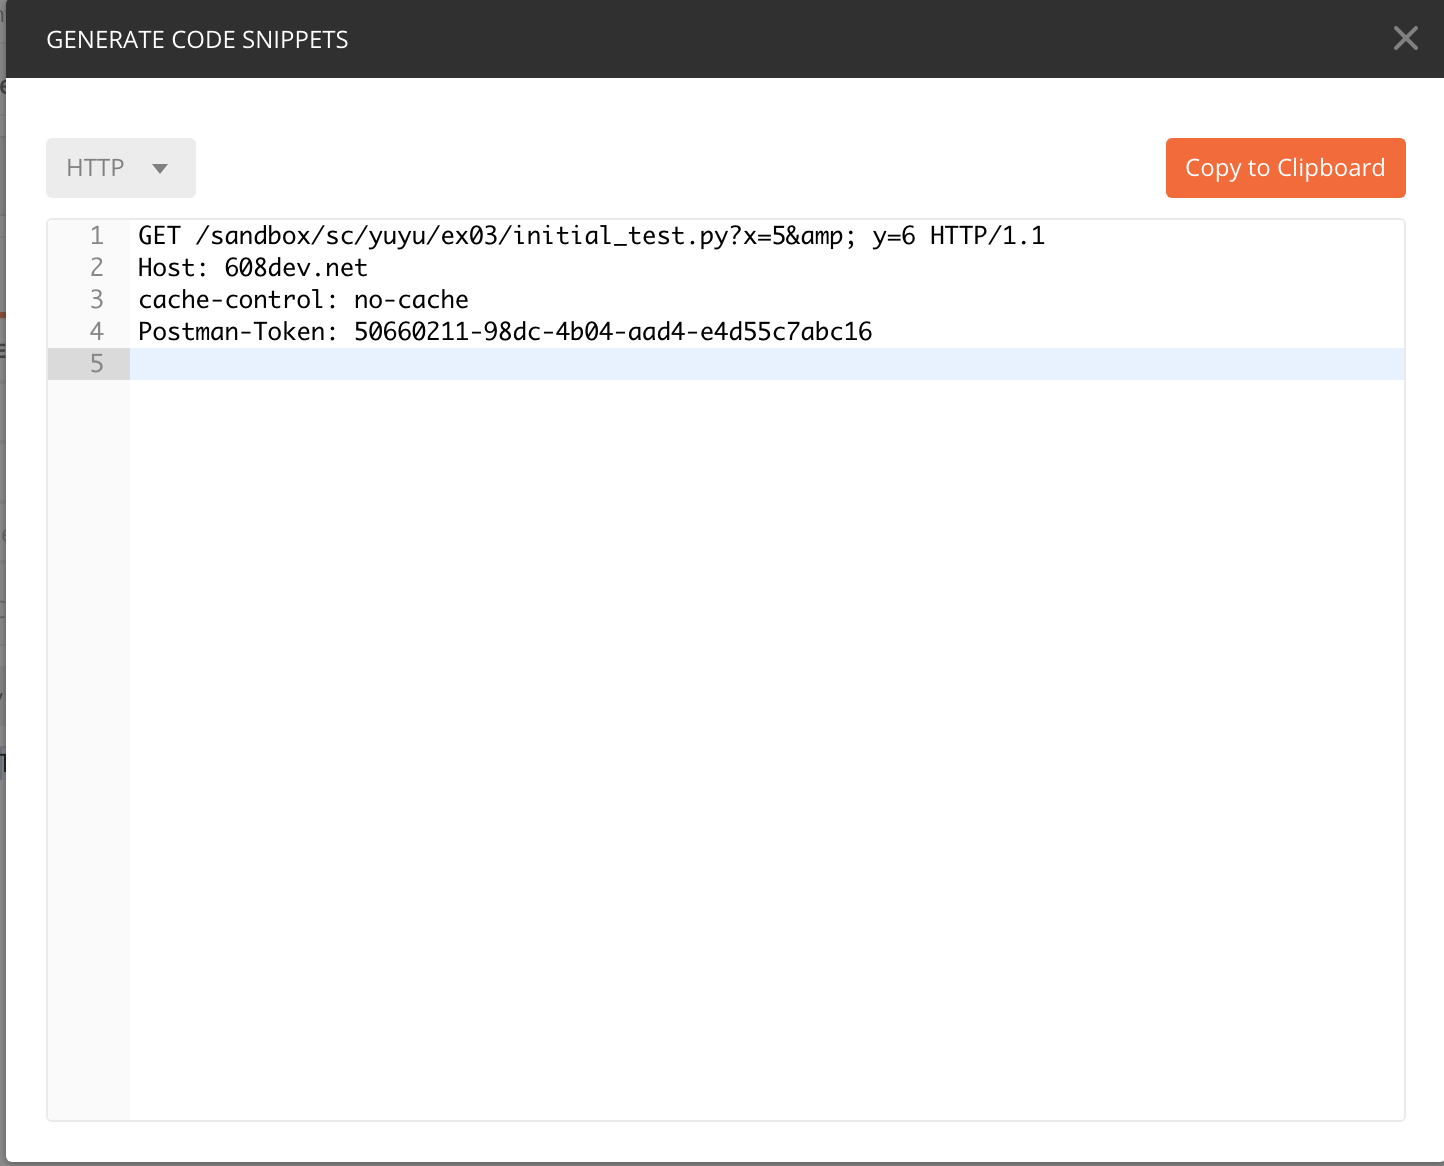
On the right side, you can also see the RAW HTTP request as it was sent up by pressing the "Code" button! This can be really helpful when trying to figure out why a POST or GET from the ESP32 isn't going through, but you can get it working in PostMan.
GETs and POSTs
If you've taken 6.08 before we spend quite a bit of time obsessing over GET and POST requests. If you didn't take 6.08 that's fine too, but for reference I'm goign to include this slide deck from 6.08 since I don't feel like typing all that info out here. It has some good notes about GETs and POSTs.
The BIG thing about GET requests and POST requests is that generally speaking a GET should be idempotent meaning that it should not cause changes to the state of a server. GET requests are meant for getting data from a resource but not modifying the data that is stored. POST requests should be non-idempotent meaning they can modify the data that is stored.
Wait a second, weren't we just using GET requests to log data on the previous exercise? Well yeah. We shouldn't have been doing that, but we shouldn't be burning fossil fuels at the rate we are either. It was easier to just do that set of exercises with a GET request, but going forward, in designing good APIs we want to adhere to the idempotency rule about GETs and POSTs.
Logging Temperature from your ESP32
So for this final part of the assignment what you need to do is:
- Write some new code for your ESP32 that takes a temperature and a humidity measurement and sends it up to an endpoint on your
efi_testFlask application via POST requests. You can use the query arguments to convey your data (don't need to use a POST body for this one, though you can if you'd like). The important thing though is to use a POST to post data - The Flask applications should log the temperature and humidity as floats (aka reals) as well as the time of when the measurement was received. Incoming data from the embedded system should be arriving via POST requests.
- The Flask application should also have a GET endpoint that takes in one argument,
time, and will return back a list of the time stamps, temperatures, and humidities that have been reported in the lasttimeminutes.
You already have most of the moving parts for this. Last week you had two code bases. One that interfaces with the temperature sensor and one that was interfacing with the web (doing a GET request). Merge thos and modify so it is POSTing the temp and humidity data to your server endpoint.
The behavior needed on the server side is likely about 90% implemented already for you. Just expand your current efi_test application...add another endpoint to handle this and go through the Flask documents to determine how to discern a GET from a POST request.
For your GET query response, just have something that spits the data back in raw text for now. Nothing fancy.
Deliverable!
It is kind of tough to test this with a nice sleek single-button tester so we'll just require you show this working functionality to staff member in lecture on Thursday 3/16/2023.
Once Done
Once done, you've basically got a decent data-logging system working. We'll work on developing dashboards next week.